Showing posts with label diy. Show all posts

Monday, January 26, 2015

STORY OF MY NURSERY...THUS FAR

It's funny how much my home changes from year to year. I don't feel like I'm always working on a project or buying new furniture, but as I look back on pictures from past years, each year almost every room in my home has changed quite a bit. I guess that's what happens when your family grows and changes so much during the years when your kids are small.

Once we found out we were having our third girl, we moved my daughter out of her room to share with her sister to make room for our new baby. It was time to redecorate it as our nursery.

I started out with an eclectic, organic nursery like this in mind...


(you can see links to these products and more ideas I had for the nursery on my Pinterest board)

But then my sweet and stylish grandma passed away and I inherited this chair. I wanted to use it in the new nursery, and thought about recovering it, but the fabric is retro and girly and I liked the uniqueness of it.


This chair changed my plan quite drastically. Nothing in my original plan really worked anymore, except the Jenny Lind crib and gold wreath. I also needed to find the bedding I wanted for her crib.

I found this crib sheet at Bohem at their Designer's open house and loved the block-print and soft blue color. It's created an eclectic vibe, which is what I really wanted in her nursery.


For the walls I loved the striped Farrow & Ball wallpaper and really wanted to use it, but the cost was more than I wanted to spend at the time, and I didn't feel like it worked as well now that I had the new chair and crib sheet.


So now I needed to decide whether to leave my blush pink walls or paint them. I took the decision to Instagram and my nice followers chimed in, helping me make the decision to paint the walls navy blue. I chose Farrow & Ball's Hague Blue, which I was more than happy with. My new go-to navy blue.


This gold medallion replaced the wreath from my board because I also inherited it from my grandma. The medallion was even better than the wreath because it hung in my grandma's home and reminds me of her every time I look at. A more thoughtful decoration.

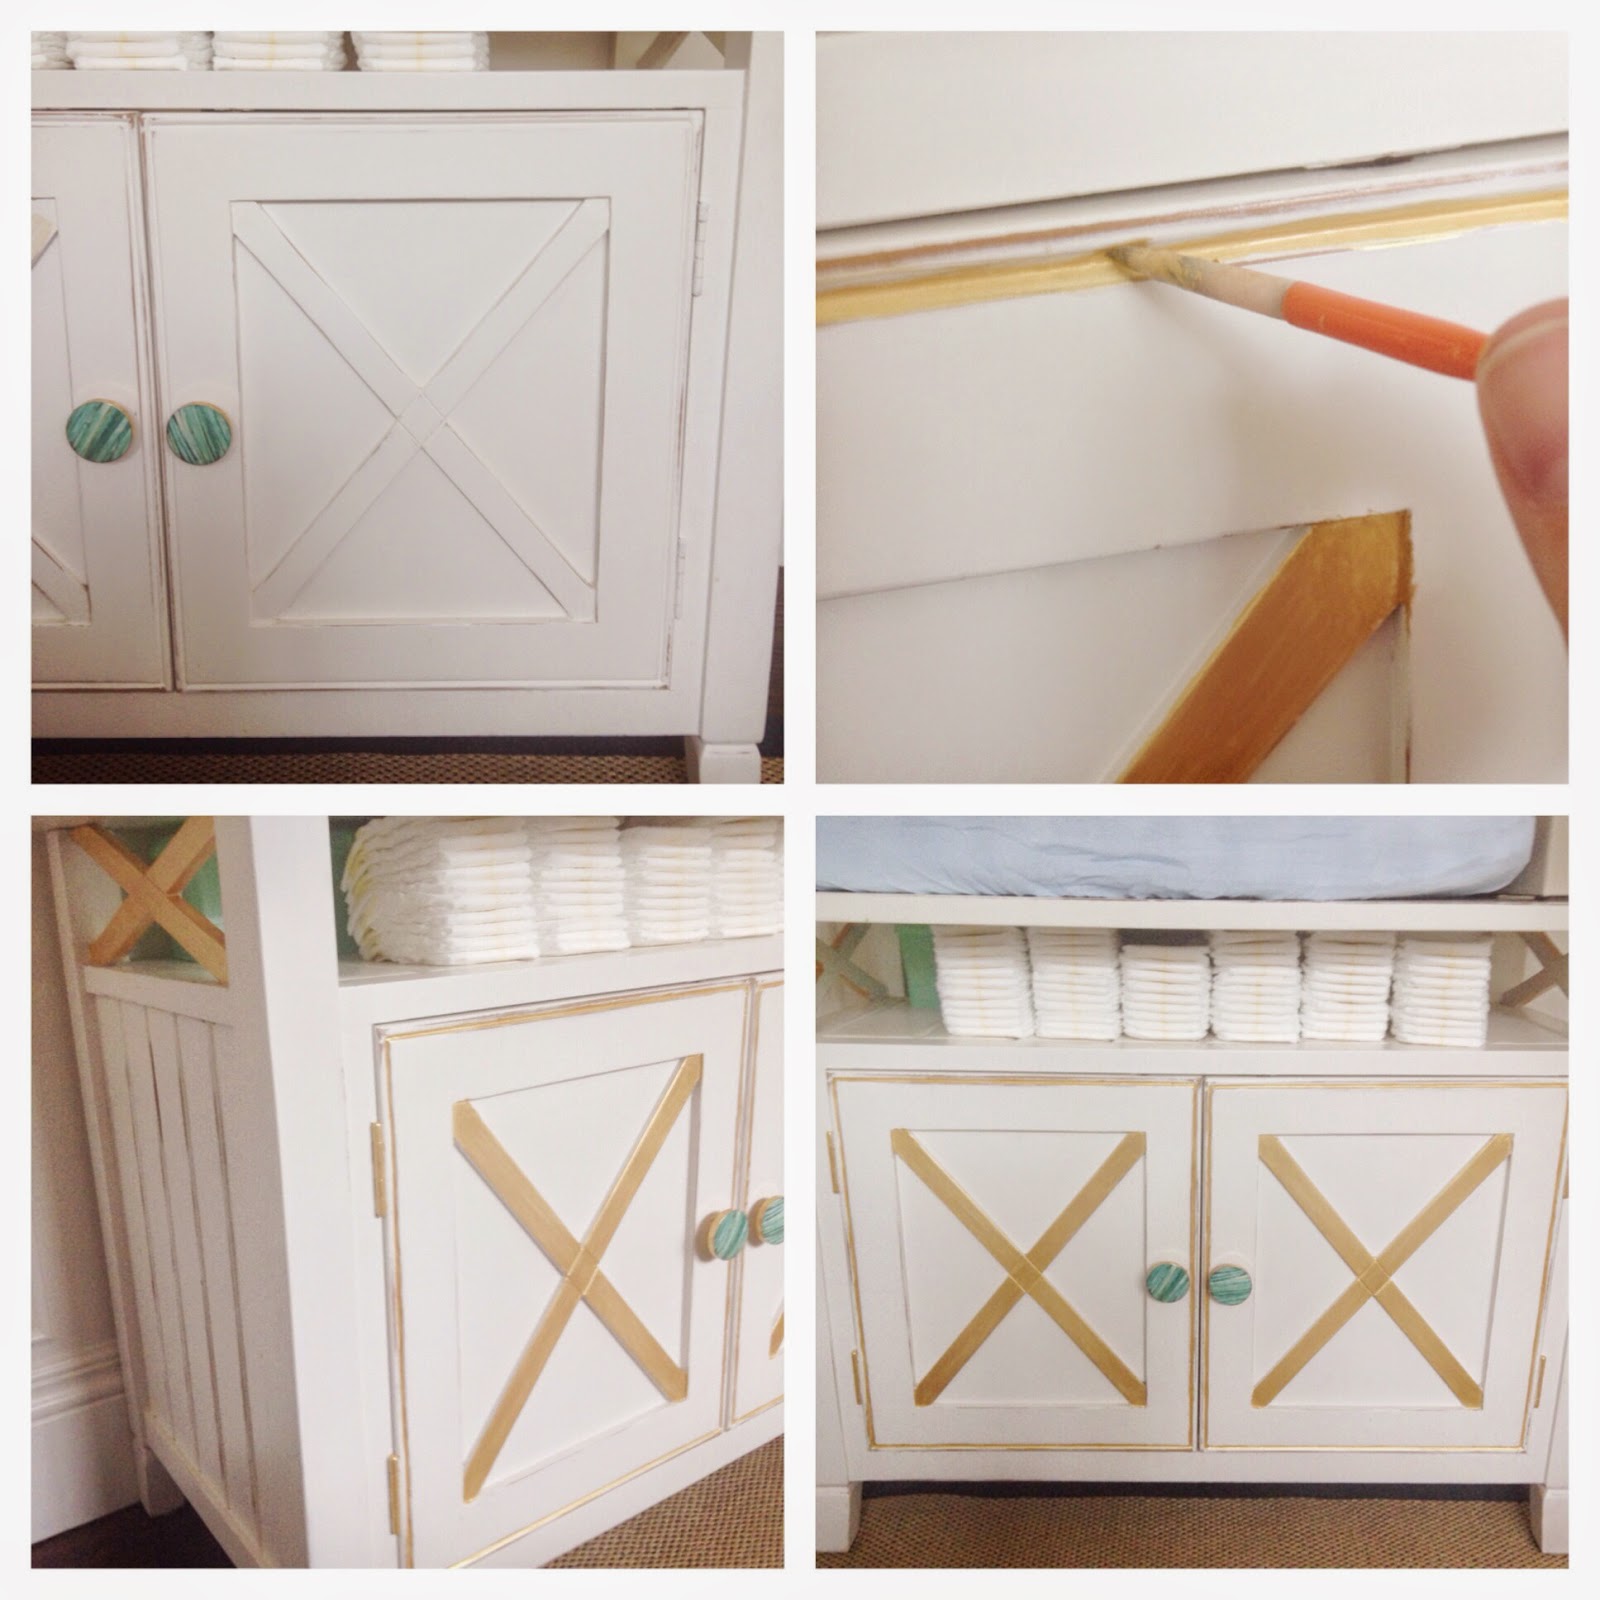
I would have loved to get a new dresser for the changing table and storage, but with all of the expenses of a new baby, Christmas, and other things, we decided to wait and just use what we had. I have had our changing table since my first daughter, and it was too shabby chic for me. I needed to update it and saw these knobs at Anthropologie that were gorgeous and perfect.


And then I got bored one afternoon and bought some gold paint and glamed up the changing table because everything looks better with gold on it, right?


I kept my sisal rug (that I've had in this room from the beginning) from Ikea, but I plan on eventually changing that out as well. My rug has a navy blue border and is no longer available, but they sell a similar one.

I am currently working on more art for the walls, curtains, and finishing touches. As soon as I feel like it's where I want it, I will share the pictures of it for a more complete view of the room. Until then...

Friday, May 10, 2013

IKEA HACK - MALM TABLE TO GRASSCLOTH CONSOLE


 As you know I'm not really a DIYer but I get so inspired when I go to Ikea. The low prices, clean lines, and easy to refinish furniture gets me every time!

Have you seen one of their newest furniture pieces, the Malm Occassional Table? This piece has wheels on the bottom so it slides over your bed to be used for reading, breakfast in bed, whatever. But when I saw it I knew it would make the perfect console table for my entry! I had been searching for so long but didn't want to spend a lot of $$ so when I found this I was super excited.


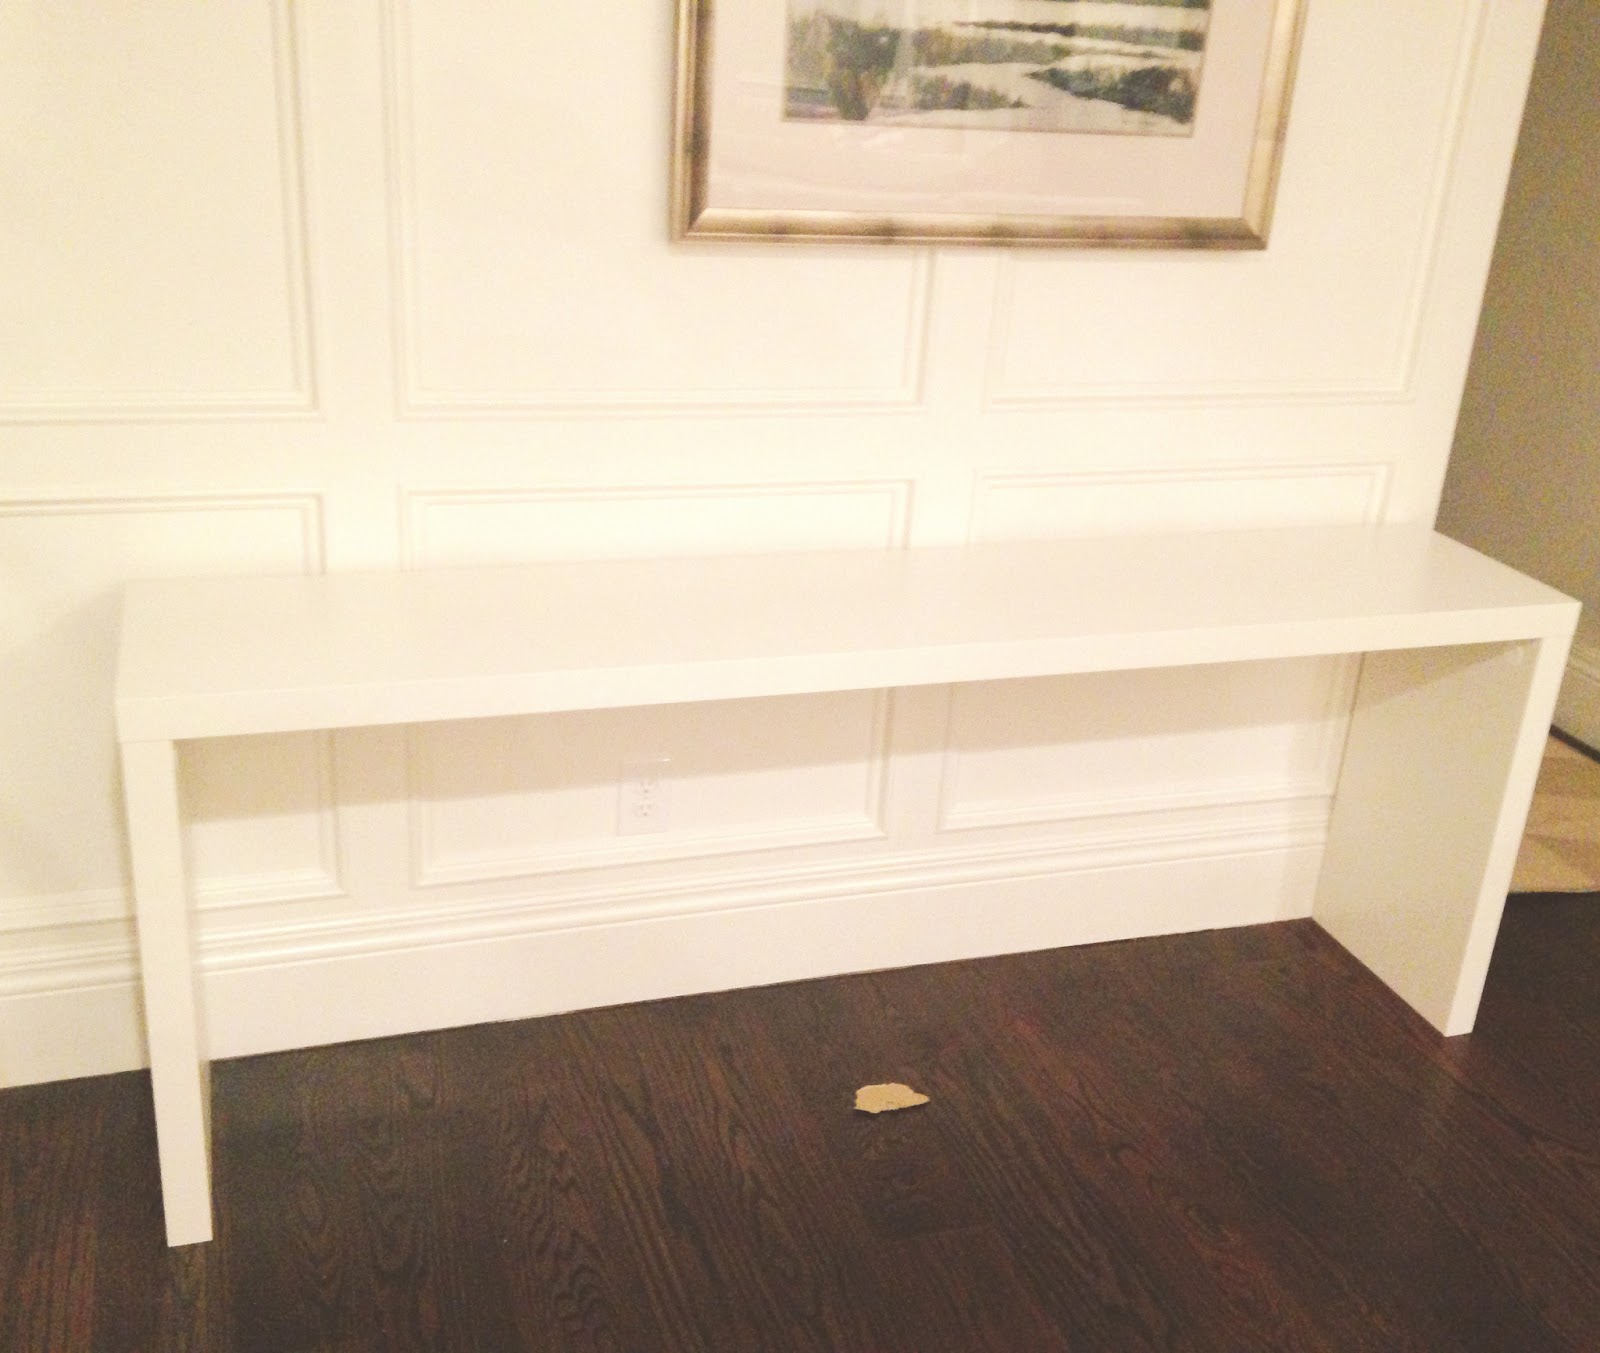
Here is the piece in real life.
(excuse the piece of the box left behind)


I considered leaving the table as is, but this piece isn't the glossy white finish a lot of their pieces are, and I would like it a LOT better if it was the lacquer finish.  I also don't love how the sides have a big seam (see pic below) and the fact that there are plastic caps on the inside of each leg that covers the screws. Other than that, the piece itself is really solid and worth every penny of the $129. (BTW, I didn't install the wheels that come with this piece)

But this table needed something more...


And it just so happened that I had some Thibaut Grasscloth laying around from a project. So I knew just what to do - cover this bad boy with grasscloth wallpaper! Here is what I used...

 WHAT YOU WILL NEED:

1. A single roll of grasscloth wallpaper.

2. Something to cut with (I used scissors, but I think an exacto knife or something like that would be really effective and precise) Grasscloth is a little tricky because the grass strips make it more cumbersome to cut clean lines. The scissors worked great for me.

2. 1 can of Spray Adhesive + 2 rolls of Permanent Double-Sided Tape


3. Newspaper (to cut templates)

This DIY was easy, yet really time consuming (a lot of cutting and measuring). I think it took me a total of 4 hours, but some of that time included trial and error and cutting 2 pieces that didn't quite match up right. I am an impatient DIYer and I pay for that mistake :)

I recommend using the spray adhesive AND the double-sided tape because the tape helps the edges stay put and the spray adhesive ensures the middle of the wallpaper sticks to the console. I have to be honest, in some places I just used the tape and in others I just used the spray adhesive and I ended up going back a few days later and putting both on there. It really needs both.

I used newspaper to cut templates of the sheets needed to cover the legs and top. This didn't really work for the top piece since it's so long. The top piece I just cut the straightest line I could down the center of my wallpaper sheet. I had to do some trimming after I applied it, but that's the fun of DIY! 

I then for each sheet of wallpaper lined all the edges of the table (where the sheet would be going) with the double-sided tape, sprayed the adhesive on the back of the wallpaper and pressed it on the table. You need to be quick with this process to make sure the tape and the spray glue doesn't dry out before you adhere it.

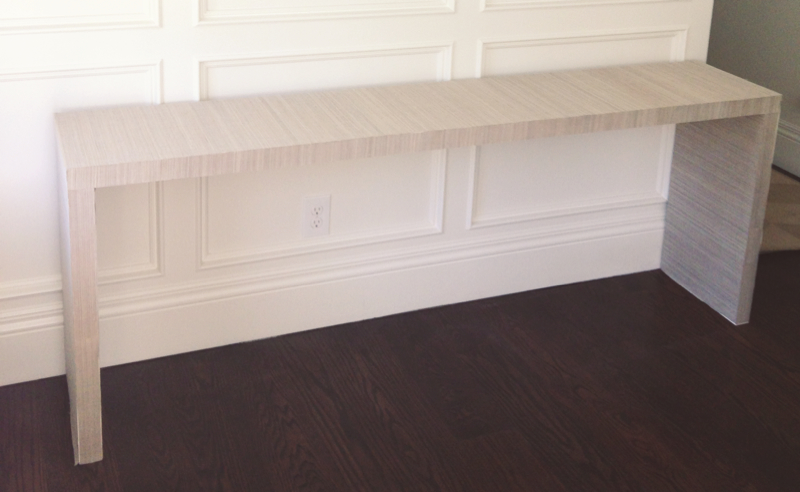
And after applying 11 sheets of wallpaper you now have a finished product!


Notice how I laid the grasscloth so the lines were running horizontally on the top and it continued down the side of the console for a clean continuous look. I did a separate strip of wallpaper for the top and the side, and the side of the leg but they look almost like one piece.


I styled the table a couple of different ways. Here I have the big Bladet glass vases from Ikea filled with white rocks from West Elm (wish they were from the beach or something meaningful :) and the sticks are bamboo sticks I bought at World Market years ago.


I had this gold tray from One Kings Lane that works perfectly as a holder of my mail. I have a mail slot in my front door so the mail drops on the floor in my entry and I just pick it up, sort it, and set it in the tray! It's a lot better than setting it on my dining room table :)


Here you can see the inside of the legs. I had the wallpaper running horizontally again, but you could do vertical and I think it would look nice as well.


This is my "I just walked in the front door and set down my hat and scarf" pic. Don't you love staging areas for a photo?! But seriously, I love that picture of my husband and our daughter and while I'm not sure how I want to style this table, I kind of like this photo there.


In this photo I put my West Elm silver branch in the center for a very "branchy" decor look.


Here I took the branches out of the vase and just set them across the table. I think I may need to slowly collect things over time that I want to put on this table. I would love to eventually put a couple of stools underneath and maybe get a rug. This post should probably end as a "to be continued...."
But for now I think I've given you enough "versions" of the same Ikea hack Malm table, so this is it until next time. BTW, in "real life" I have a basket underneath this table filled with shoes! 

I would love to hear which styling you liked best for this table. And as always, if you have an Ikea hack you would like to share - please send it on!

And have a great weekend! I will be hanging with Leo at the theater watching The Great Gatsby with the hubby and some friends (how excited are some of you about this movie!)

Wednesday, March 13, 2013

SHARPIE POTTERY DIY - GOLD DOT BOWL

This is not a DIY that is going to blow your mind. Nope, not very special, but I have to say I loved the end result enough to share it with you. This might be the easiest DIY I've ever done so all of you who want to do something "crafty" while watching your favorite show at night - this is a sure crowd pleaser :)

On one of my (very frequent) trips to Target I spotted this super cute white dotted bowl.

And because I love gold I of course had a metallic gold Sharpie laying around! In the spirit of Kate Spade I thought little gold dots would make this bowl even better, so I went to work, making little dots on top of the bumped out dots. I varied a little between bigger and smaller dots to give it dimension.

I used the regular Sharpie, although I know Sharpie makes a paint pen that is for this specific purpose. In my experience a regular metallic gold Sharpie works just as well.


As you can see it wasn't a perfect process - I just went around the bowl in sections.


When I was finished I drew a line long the top of the bowl to give it a finishing touch.


And then I baked it in the oven at 350 degrees for 30 minutes (thanks to many DIY's on Pinterest who discovered if you bake it on then it won't wash off, but recommend hand washing it always).

And this is my finished product! It's a little cuter than it was before, right?! And it only took a total of 1 hour because of the 30 min. baking time.


I like it on my mantle, but it looks pretty cute in the kitchen...decisions, decisions.


If you have a Sharpie DIY please share!! I am like a 2-year old...I want to draw with a marker all over everything in my house!!

Wednesday, December 5, 2012

IKEA HACK UPDATE - LITTLE GREEN NOTEBOOK FEATURE

We were thrilled to have our Ikea Hack featured yesterday on one of our very favorite blogs Little Green Notebook!  Jenny is always doing such amazing DIY work, we were beyond excited she liked our simple project. We took some better pictures of the desk so you can see her in all of her inexpensive glory! Click here for more details.


Friday, July 13, 2012

PAINTED PILLOW

It was 102 degrees yesterday - too hot to do anything. So I was bored and saw a white linen pillow cover I had made that looked too plain for my taste. Then I saw my paint samples I have in a box and got an idea...


Caroline had wanted to paint earlier that day so I thought, "I'll let Caroline paint the pillow"! It was an inexpensive fabric so I didn't care if it turned out horrible. Besides, Caroline thought it was the coolest thing ever to paint this pillow.

She was so careful and did a great job. I don't know if I LOVE the pillow, but I love that she painted it and it looks pretty cool. I think I might put the pillow in my master bedroom, or leave it on the kitchen bench. Not sure yet...

It turned out Anthropologie-esque, right?
(Oh, and don't mind the dirty bench seat - I haven't cleaned it in a while and I let my kids have at it on there. It is made out of Sunbrella fabric so it all comes off eventually :)

Related Posts Plugin for WordPress, Blogger...